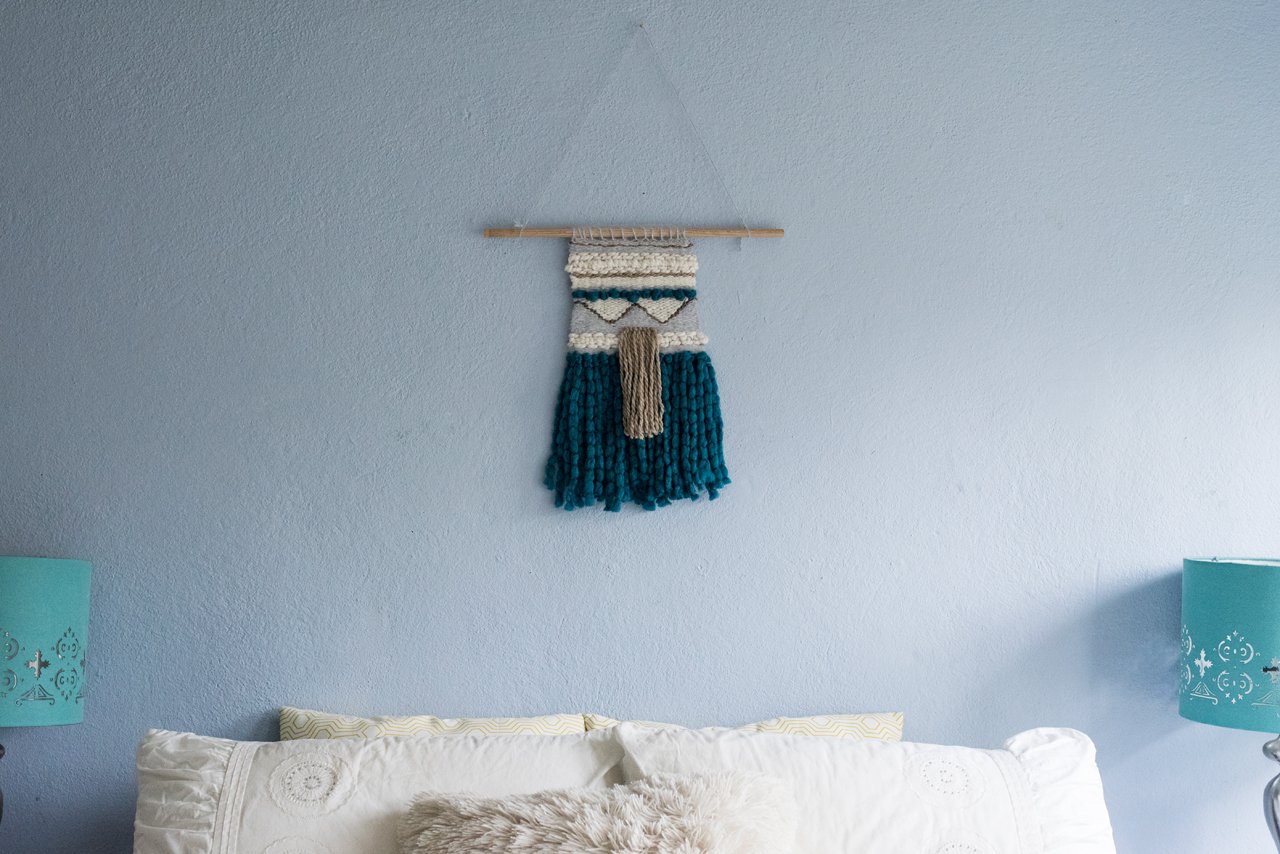
Ever had that moment when you suddenly notice a certain something is everywhere? That’s what’s happening right now with woven wall hangings. A touch of ’70s boho mixed with a dash of crafty macramé, these little textured pieces are being peddled at stores such as Anthropologie to the insane tune of $750. Like the look but not the price tag? We hear you. Here’s a detailed step-by-step so you can DIY your very own.
Materials: Scissors; 3 to 5 colors of yarn; darning/tapestry needle; shed Stick (or a paint-stirring stick); dowel rod cut to 12 inches or shorter; 1-inch nails, hammer, and a pencil; wood board cut to 12 inches x 9 inches x 3/4 inch.
A quick note on weaving terminology:
-The warp refers to the lengthwise or vertical threads on a loom.
-The weft refers to the the yarn threads drawn horizontally through, over, and under the warp.
To build the loom: Measure and place nails a half-inch apart and a quarter-inch up from the edge of the wood. Mark your measurements and hammer in the nails about a quarter-inch down or until snug. The loom can be any size you want. You can also use a wooden frame instead of a wood plank for easier access to the back of the weaving.
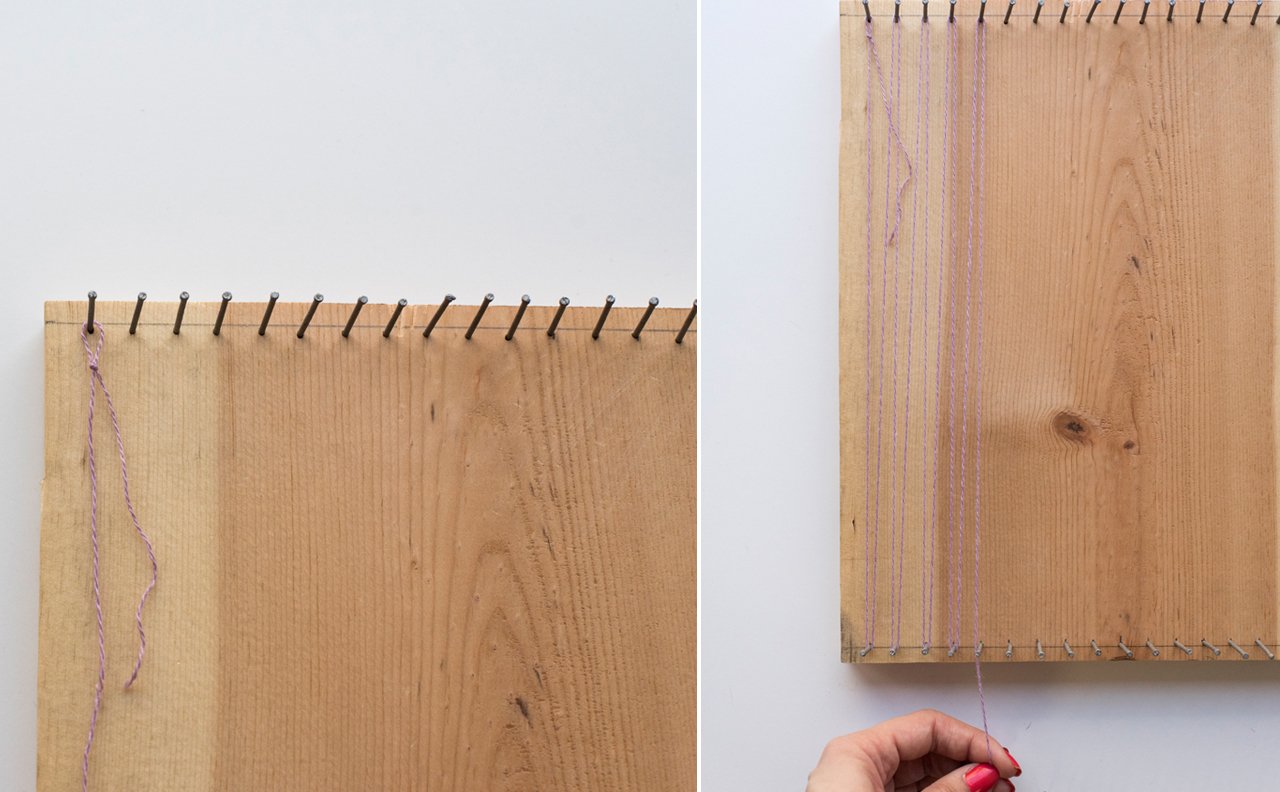
1) Choose a yarn to be the warp. This yarn color will show through your weaving, so select a color that compliments your overall design, and aim for a lighter weight yarn. Begin by making a loop knot that has at least a four-inch tail. Fasten it to the top left nail and begin to string the yarn by going down to the next nail and then back up again. Make sure your warp is neither too loose nor too tight, and repeat until you get to the last nail. Finish with another loop knot.
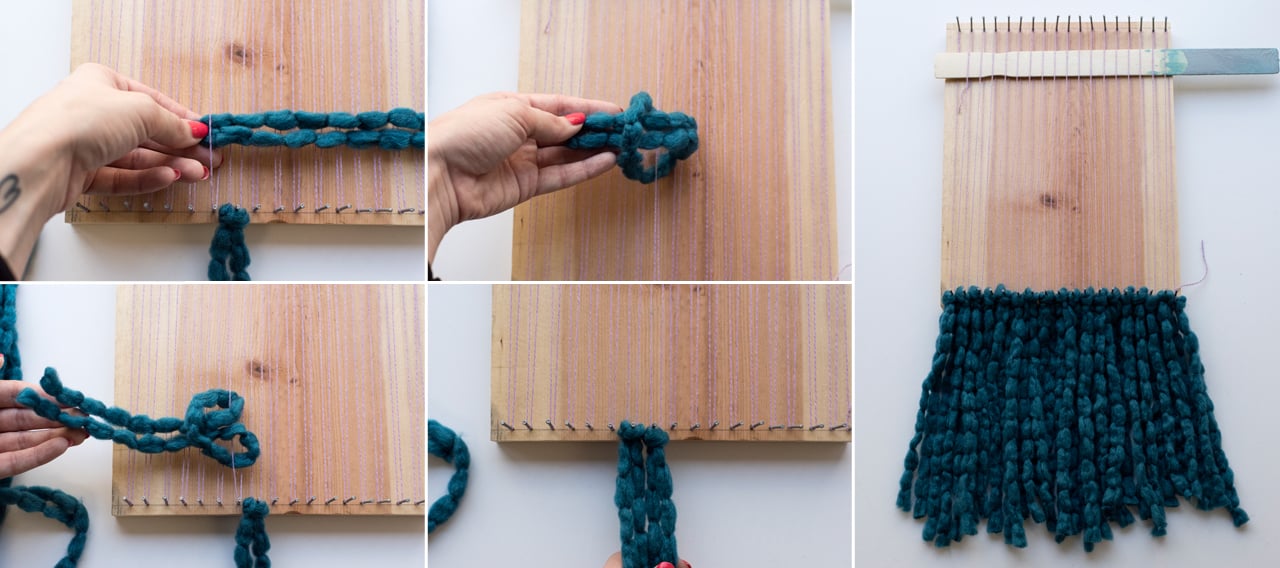
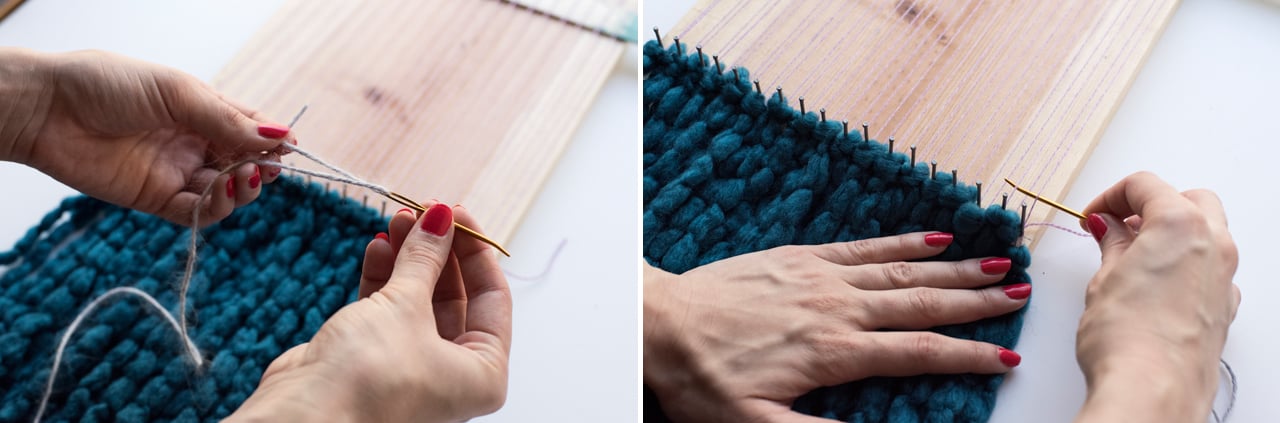
2) If you want tassels, add them now. Determine your desired tassel length, while keeping in mind that you’ll be folding the yarn. Cut as many yarn pieces as you have nails. Fold your yarn in half once or twice depending on desired thickness and length, then slip it underneath the string to the left of a nail, fold the ends of the yarn over the warp string through the yarn, pull snug, and slide it down the string until it’s resting underneath the nail. Repeat for all nails until there is a tassel beneath each one. Then complete Step 2 within the loop itself for a loop knot.
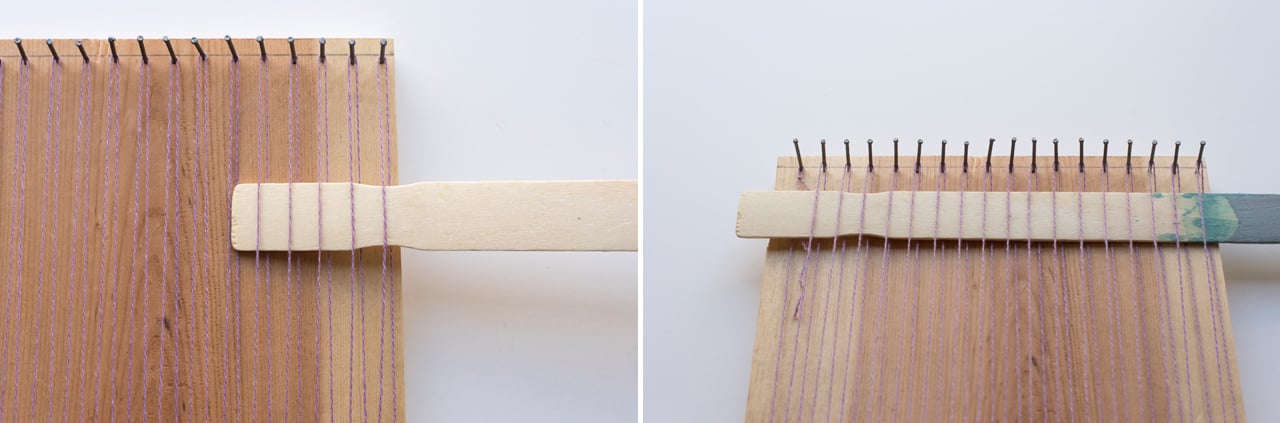
Step 3: Now begin your weaving! To save time, insert your “shed” into your warp. This will help you for every other direction as you weave back and forth. Thread the shed over and under until the end, then lay it down flat.
4) Decide what your first color and pattern will be, then thread that yarn through your darning needle, leaving about a four-inch tail and cutting the yard from the skein at about three feet. A standard weave is over-under, over-under. Begin weaving your needle right to left at the bottom near your tassels. It’s important that once you pull through to the other side you still maintain that 4-inch tail at the end. This will be woven into the back side once the weaving is finished. Once you make it to the other side, sit your shed up. This allows you to skip weaving over and under left to right and instead you can just pull it through. Make sure not to pull too tightly! Lay the shed back down once you get back to the right side.
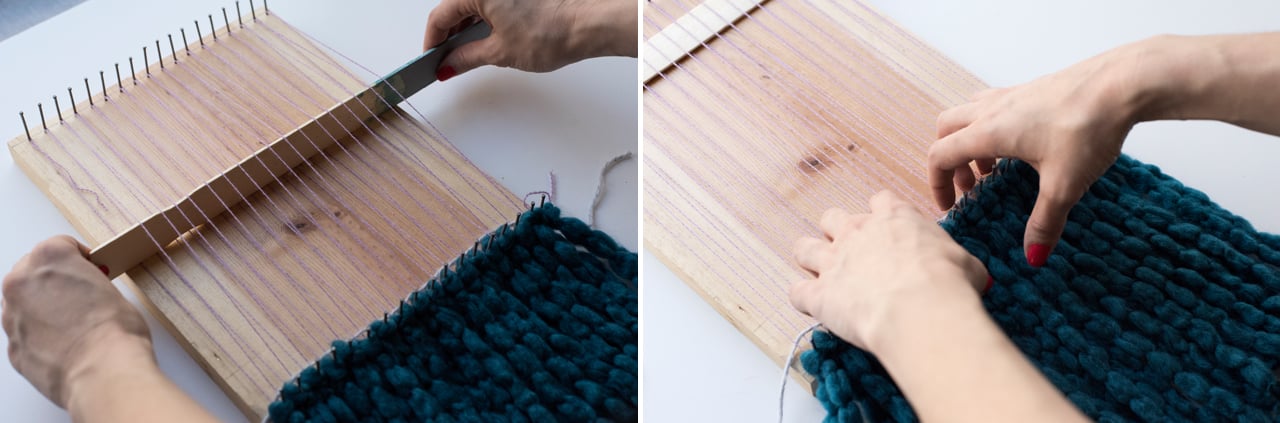
5) Using your fingers, push the yarn down so that it rests against the previous row.
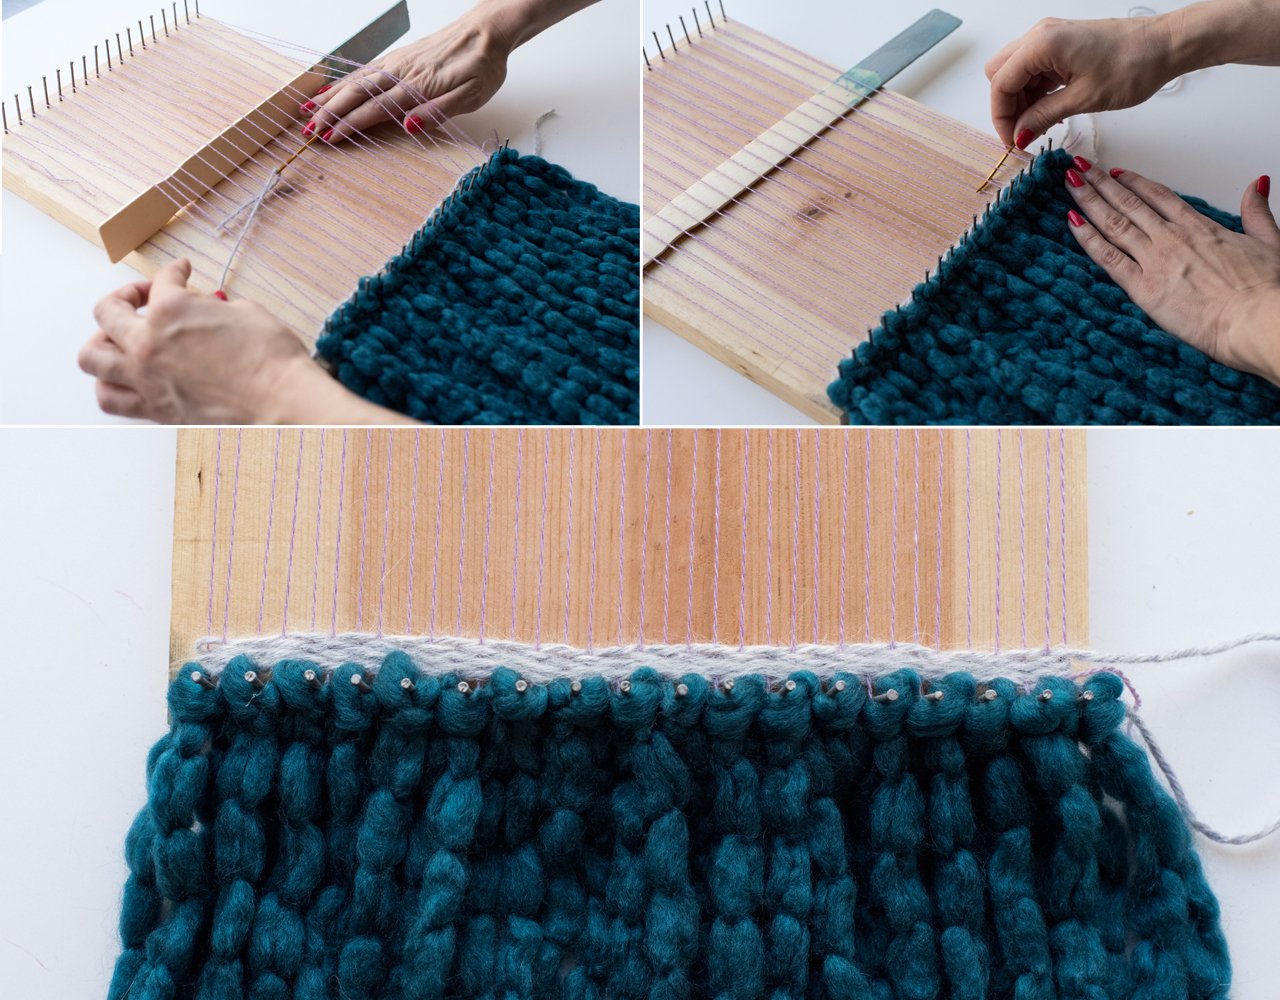
6) Continue to weave back and forth as many rows as you’d like in that color.
7) To switch yarn or color, repeat Step 4. In the row with the white fluffy yarn, we chose to go over two, under one. The more you go over the warp string the more you will cover it, so it all depends on the look you want. Feel free to add tassels in between your weaving in the same way we did in Step 2.
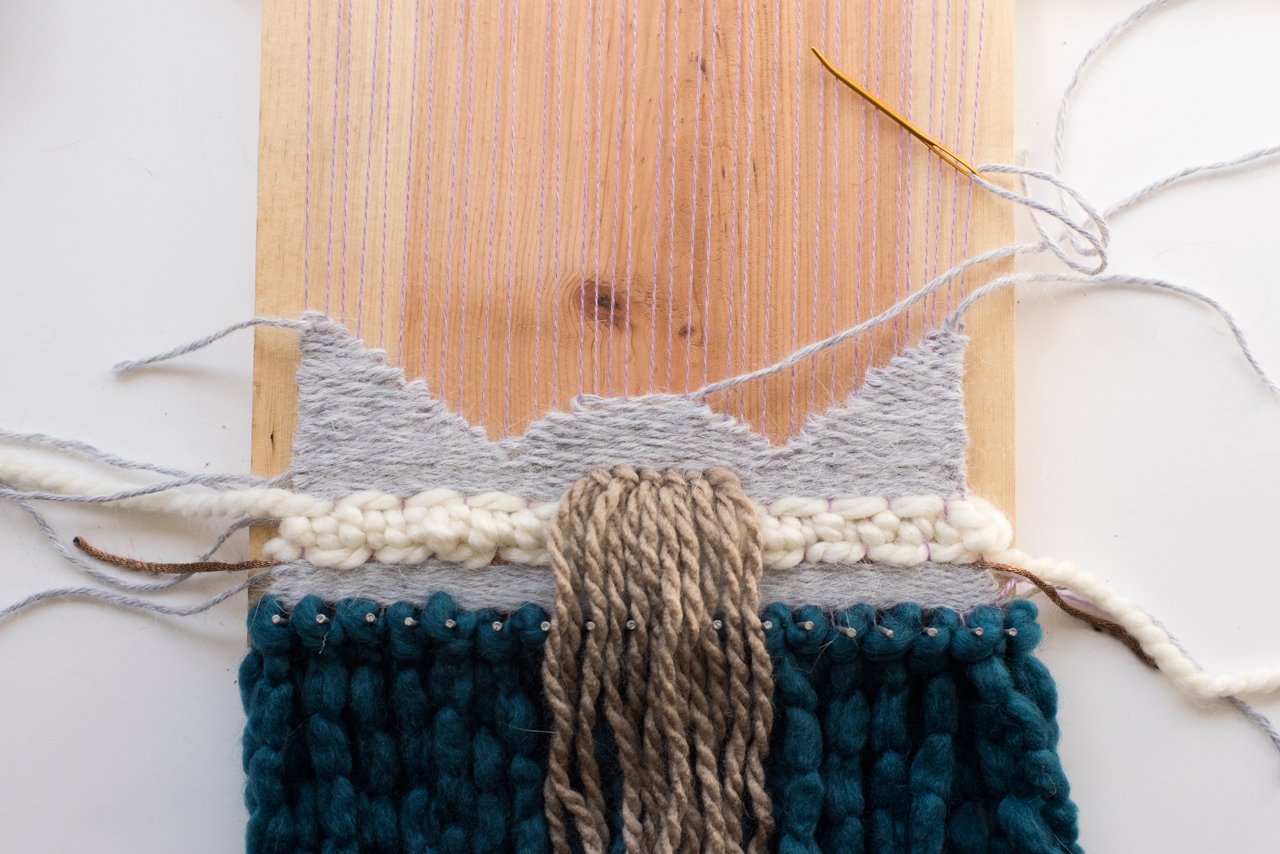
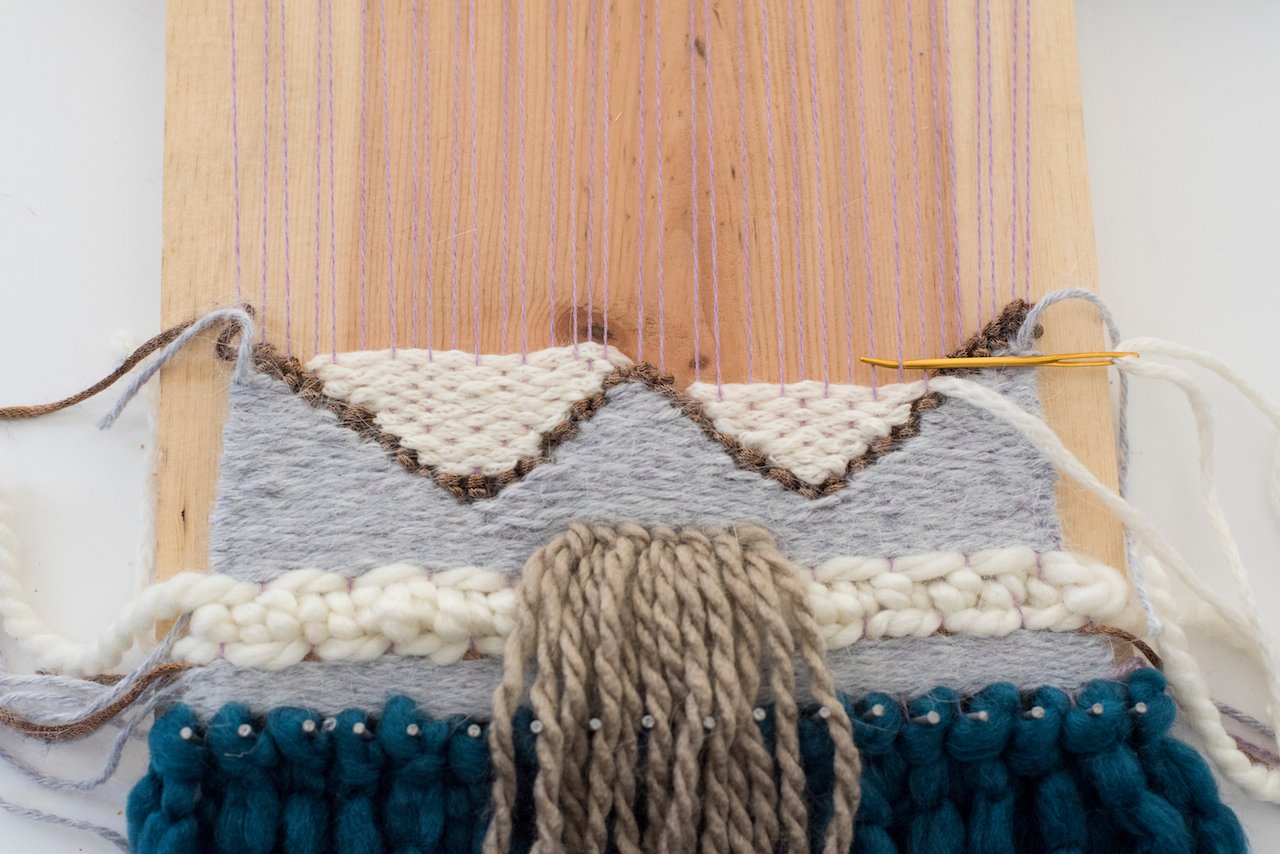
8) Experiment with shapes! To get three grey triangles like ours, continue with the over-two, under-one pattern but decrease the number of strings woven under with each row. Start with the outside triangles. Be sure to continue pushing down your yarn after every row.
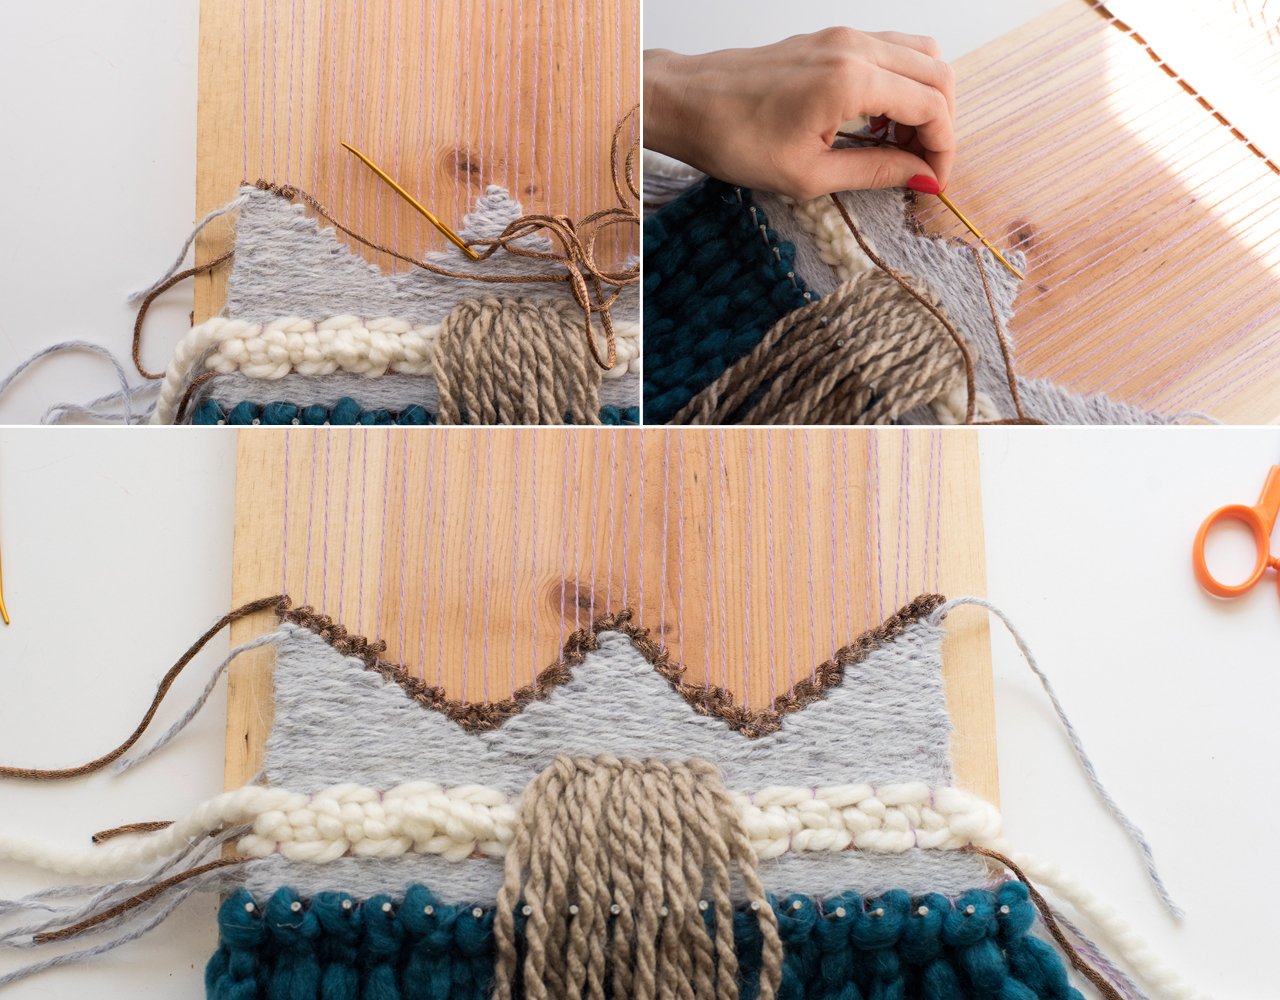
9) We wanted to outline the triangles with a different color yarn and also a new pattern—a braided effect—so the bronze yarn was woven in with a under-two, back-one pattern. Repeat until the end.
10) To fill in the triangle’s negative space, start your weaving at the bottom of the tip and work your way back up. Once you’re on the same field again you can continue weaving all the way over from the right to the left and back again, switching colors and patterns. Here we changed to a thick blue yarn, returned to the grey, then to white.

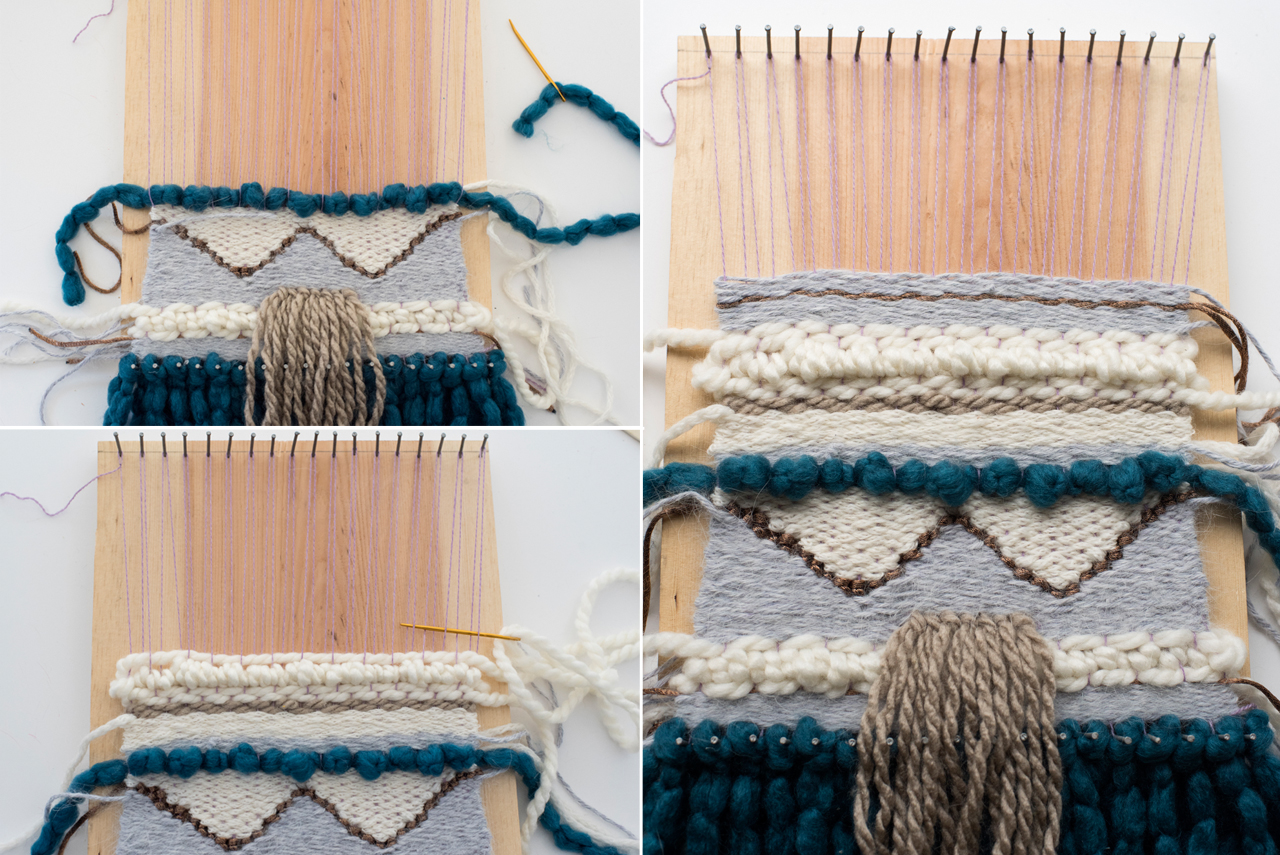
11) Stop when your weaving is about five inches from the top of the loom. To remove your weaving from the loom, lift off the yarn from each nail, cut it and tie it down onto your last row one at a time. This will secure your weaving so it doesn’t fall apart. Once all of your warp strings are tied off, gently lift the bottom of your weaving off of its nails to take the entire piece off the loom. Flip your weaving over. Take each tail, one at a time, thread it through your needle and stitch it into the back side of your weaving. Trim the ends. We started with the warp strings at the top and tucked those in, then wove the side strings back into their colors so that it wouldn’t show through on the front side.
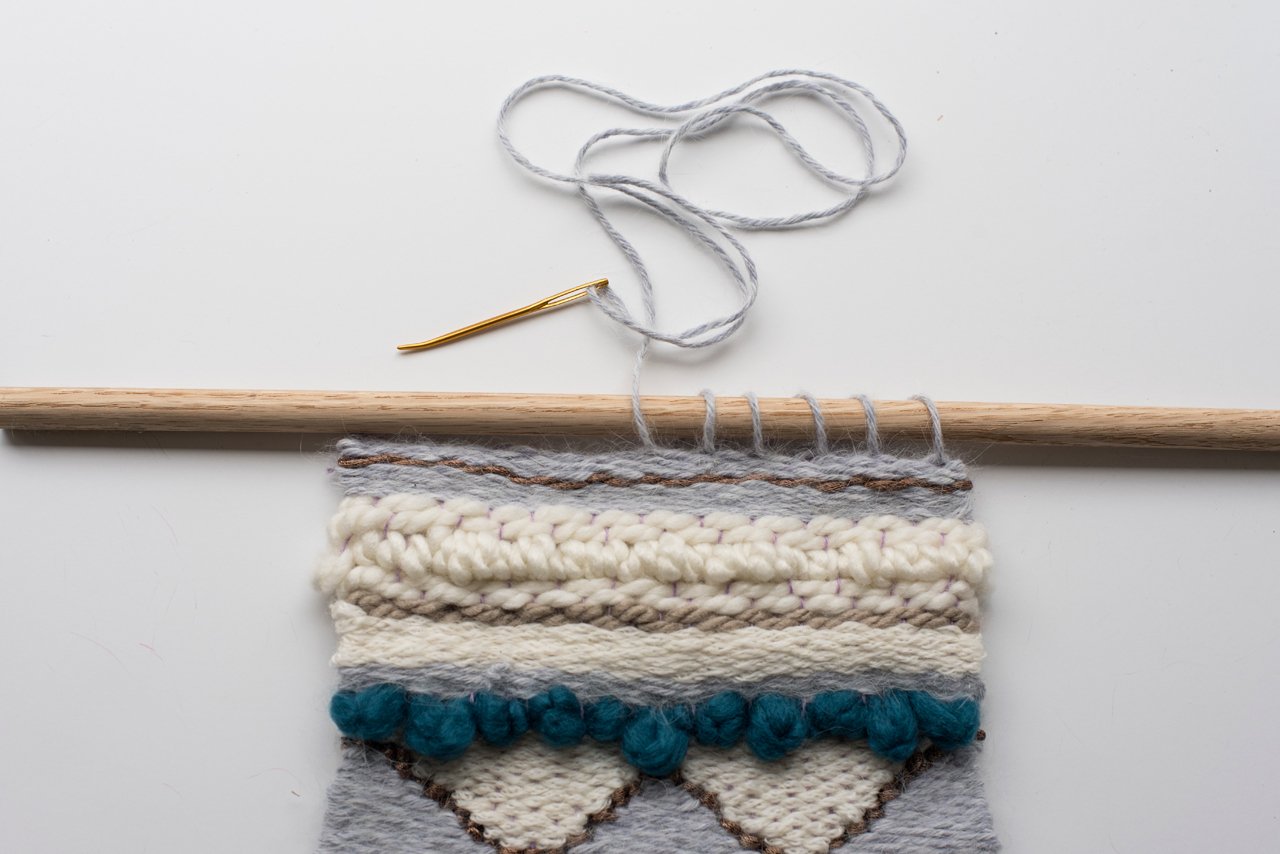
12) Flip your weaving back over to the front side. Grab your dowel rod and cut another piece of yarn. Tie a knot on one end of the yarn, and starting from the right of the weaving, stitch through it and around the rod. Repeat until you get to the end of your weaving. You can also use a pipe or a branch instead of a dowel rod!
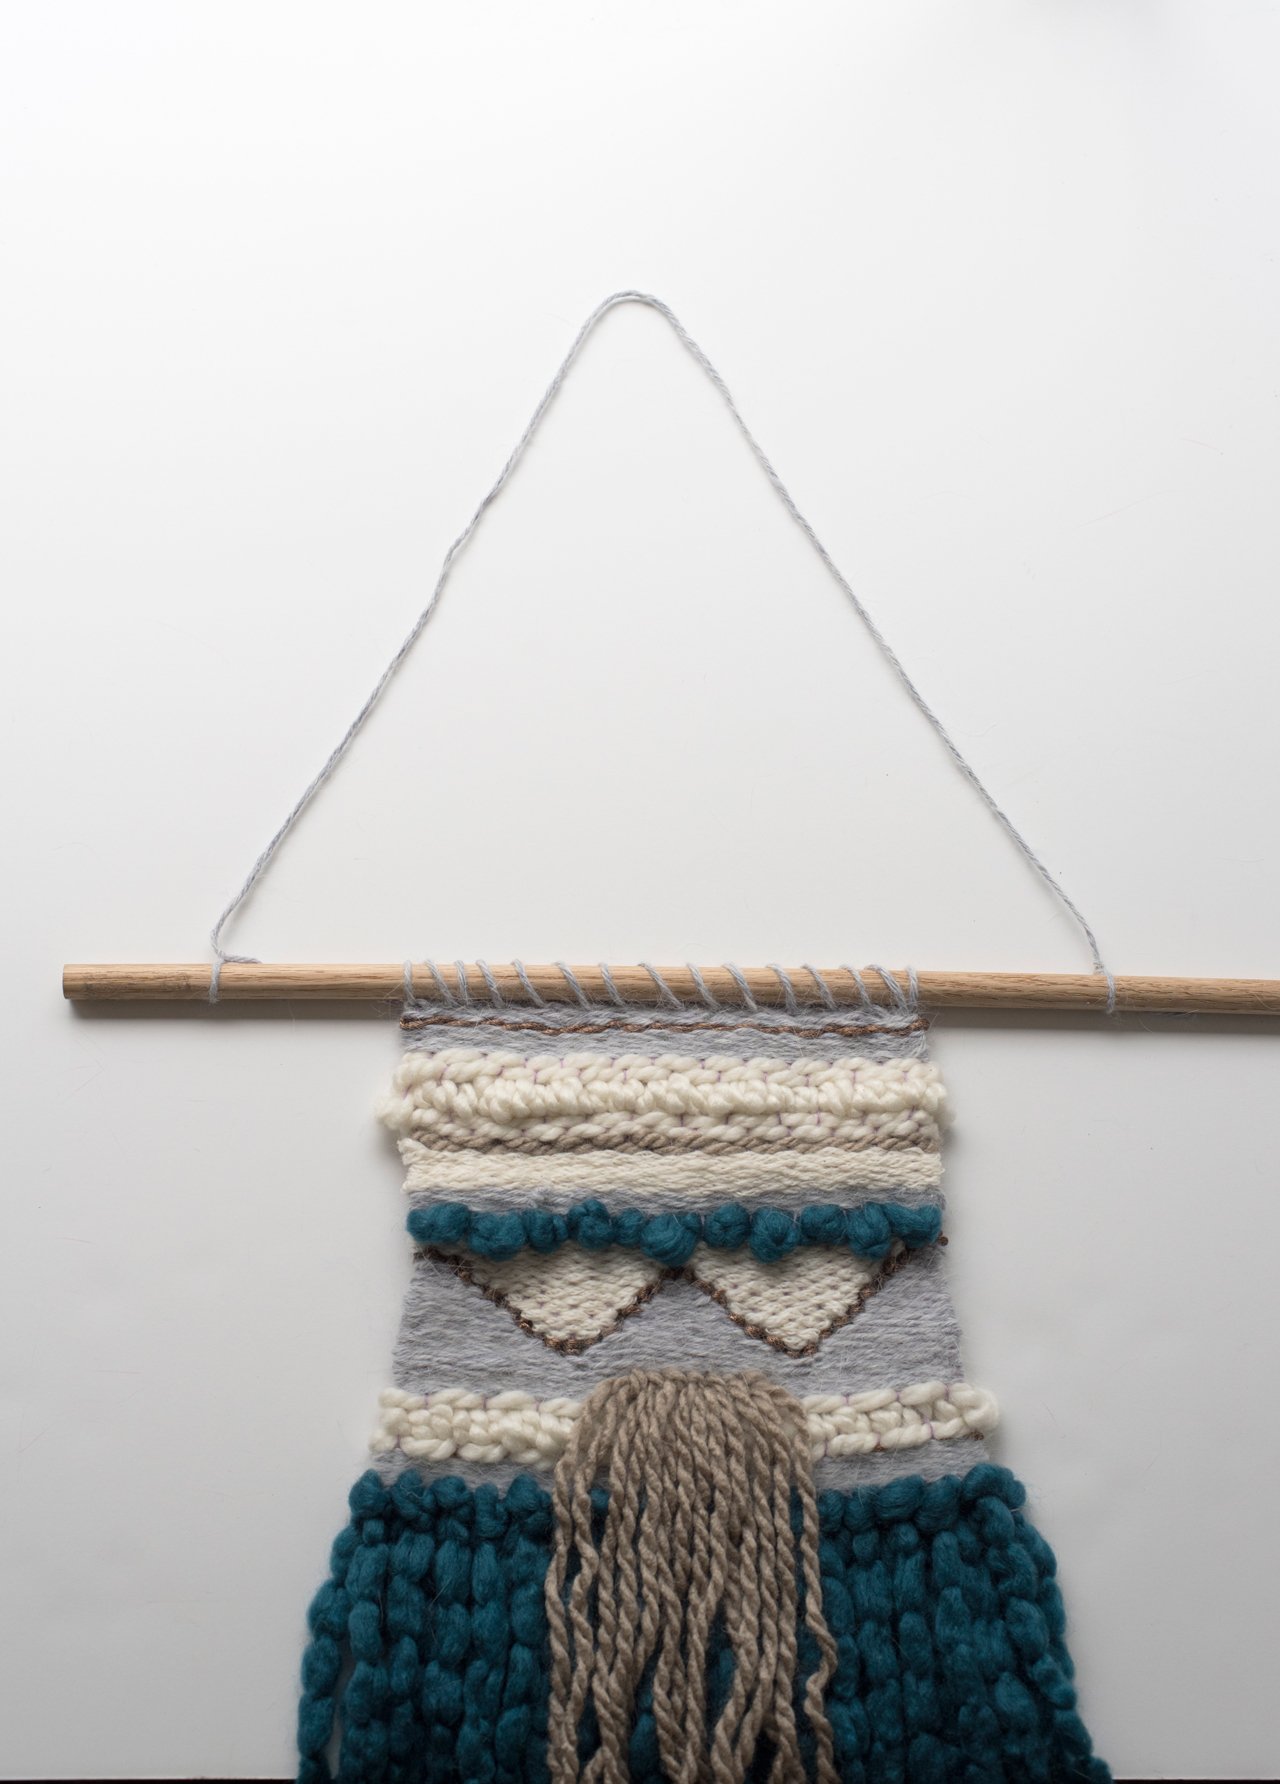
13) Once your weaving is secured to the rod, cut another piece of string to make a hanger using the same loop knot we used in the beginning. Make a loop knot on each end of your string and slip them onto either side of your weaving.
You’re done! Hang for display anywhere you’d like.